


By placing an order, you are agreeing to our privacy policy and terms of service.
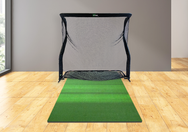
- Looks built with the house: the screen mounts flush to your wall with no pipe or frame and spans it corner to corner.
- Sewn for your wall: 45 size combinations and 4 screen materials, cut and sewn in Milton, Wisconsin.
- Fit confirmed before it ships: we check your exact wall dimensions, masking, and panel layout with you before anything is made.
- The room stays a room: nothing stands on the floor, so curtains or panels pull back and movie night moves back in.
Lead time notice: for orders placed August 27, 2026 or later, Carl's Place production time is temporarily about 9 business days, and about 16 business days for custom screen orders, plus normal shipping time. Normal lead times are expected back in early September.
A Golf Room Built Into the House
Some walls hold a TV. This one holds your home course. The Carl's Place Built-In Golf Room Kit mounts the impact screen straight to the wall, sewn to your exact wall dimensions, so it spans the wall corner to corner, with adjustable masking that tunes the viewable area toward your projector's 16:9 or 16:10 picture and turf that can run right up to the fabric.
Because each screen is made to order, we confirm your exact size and layout with you before anything is sewn, and a real person answers if you get stuck. Authorized Carl's Place dealer · Affirm financing available.

A Screen That Becomes Part of the Room
Watch how the built-in screen mounts flush to the wall with cables and tensioning hardware for a permanent, finished golf room.
What Sets a Built-In Room Apart
Looks Like the House Came This Way
No frame, no pipe. The screen mounts flush to the wall and spans it corner to corner, so the room reads as finished carpentry, not equipment you assembled.
Made for One Wall: Yours
Every screen is sewn to your exact wall dimensions. We confirm your size and layout with you before your kit is built, so it fits the first time.
Masking That Squares the Picture
Adjustable masking tunes the viewable area toward your projector's 16:9 or 16:10 image, so the picture lands closer to where it should instead of spilling onto drywall.
Turf Runs Into the Screen
With no bottom border, your turf can run all the way to the fabric. Ball on the mat, fairway on the wall, and no strip of hardware between them.
The Room Keeps Its Second Job
Nothing stands on the floor, so the bay never swallows the room. Curtains or panels pull back and the same space seats the family for a movie by 8 pm.
Cut and Sewn in Milton, Wisconsin
Carl's Place sews every screen in Milton, Wisconsin, built for full-impact play and made to stand up to regular indoor golf use.
How Much Space You Need
Get the tape measure out before you pick a size. You want at least 10 feet between you and the screen, with roughly 7 feet of swing room in every direction. The grid below has the rest of the numbers.
Is a Built-In Room Right for You?
You Already Call It the Golf Room
The spare room has had a name in your head for a year. This kit makes the wall agree: a permanent bay that looks designed in, with nothing parked in the middle of the carpet.
Your Laser Level Gets Weekend Work
Lag screws into wall plates, a line to keep true, a screen to tension until it sits flat. That is a Saturday you would enjoy, and the finished wall is one you built yourself.
You Want It to Look Original to the House
Temporary equipment in a finished home bugs you. A screen built into the wall, with turf running right up to it, reads like the house was designed around golf.
The Family Has a Claim on This Room
Movie night is not moving out. With the floor open and curtains that pull back, the room plays golf after dinner and is the den again by morning.
Not comfortable with construction work? A free-standing kit assembles without this level of build. Compare the two approaches in our built-in vs freestanding guide.
Every Carl's Place impact screen is built for full-impact play and designed to withstand the rigors of regular indoor golf use, so the screen anchoring your room is built to last.
Everything That Ships in the Kit
The built-in screen installs with no pipe or frame. Everything needed to hang and tension the screen on your wall comes in the kit.
- Custom-sized impact screen with top masking, pre-fed bottom cable, and loose top cable
- 2 cable locks with release pins
- 4 corner cable anchors with 1/4 in lag screws and 4 pulley wheels with safety wire lynch pins
- Starter panels made entirely of loop fabric
- 10 snaphooks with screws and drywall anchors
- 10 zip ties for the corners and 50 hook-and-loop straps
- 3 detached flaps to cover the exposed cable
- Fastener set with 100 long screws, drywall anchors, and 50 short screws
- Detailed setup and measuring instructions
Choose from 4 screen materials (Standard, Preferred, Premium, and High-Contrast Gray) across 45 size combinations. Every screen is built to the exact size you order, so pick the listed size that matches your room exactly. Deciding on a material? Our impact screen materials guide breaks down each one. Need a size between the options, or a wall wider than 18 ft? Build your kit to the inch with our custom room builder.
Before you order: because each screen is built to your exact wall dimensions, Built-In kit sales are final. We confirm your size, masking, and layout with you before anything is produced.

All the Ways to Finish a Built-In Room
Start with the built-in screen, then choose how to protect and finish your walls and ceiling.
Built-In Screen Only
The screen and its hardware install with no pipe or frame, and you finish the walls and ceiling your own way.
Wall & Acoustic Tiles
Adhesive-backed tiles trim to fit and cut around outlets and lights. Wall tiles soften impact; acoustic tiles add light and sound control.
Retractable Curtains
Heavy-duty curtains block ambient light with reinforced grommets and a weighted bottom. Pull them across to play and back for access.
Padded Panels*
The most protective option: a foam core in smooth black fabric, custom-sized to your room and hung with French cleats and Z-clips.
* Padded panels require freight shipping (residential delivery with liftgate). Freight is calculated at checkout.
How the Built-In Kit Compares
All four Carl's Place kits use impact screens built for full-impact play. What changes is how the screen mounts and how finished the room looks.
| Feature | Built-In Room Kit | Pro | Curved | DIY C-Series |
|---|---|---|---|---|
| Mount | Wall-mounted, no frame | 2-inch EMT frame | 2-inch EMT frame | 1-inch EMT frame |
| Structure | Built into the wall | Freestanding, flat | Freestanding, curved | Freestanding, flat |
| Install effort | Construction-level | Assemble the frame | Assemble the frame | Assemble the frame |
| Floor space | Fully open | Frame footprint | Frame footprint | Frame footprint |
| Permanence | Permanent | Semi-permanent | Semi-permanent | Semi-permanent |
| Screen materials | All 4 | Premium or High-Contrast Gray | Premium or High-Contrast Gray | All 4 |
| Best for | A finished, built-in room | A dedicated finished bay | Maximum immersion | An affordable first bay |
Compare the freestanding kits on their own pages: the Carl's Place Pro, the Curved, and the DIY C-Series, or browse the full Carl's Place collection.
Building the Room, Step by Step
1. Plan & Measure
Start with the included setup instructions to plan the layout and measure your wall so every component fits your room.
2. Install the Hardware
Mount the corner cable anchors to the top and bottom plates of your walls, install the starter panels in a straight, even line, then add the ceiling snaphooks, using a laser level to keep everything aligned.
3. Hang & Tension the Screen
Zip tie the corners of the screen, secure the remaining grommets to the cables with hook-and-loop straps, then pull the cables taut through the cable locks for a flat, even hitting surface.
4. Secure the Flaps, Then Finish
Attach the 3 detached flaps to the starter panels to cover the exposed cable, then protect the walls and ceiling with curtains, wall or acoustic tiles, or padded panels.
Confirmed Before It Ships
We confirm your exact screen size, masking, and panel layout with you before your kit is produced, so it fits the first time.
Know the Skill Level
This kit suits handy people comfortable with construction: lag screws into wall plates, demoing trim, and patient screen tensioning. If that is not you, a free-standing kit is the easier route.
Pick Your Wall. We Confirm Every Inch.
Choose your size and screen material, and before anything is sewn we go over your exact wall dimensions, masking, and layout with you. Made in Milton, Wisconsin, and nothing goes to production until the numbers are confirmed with you.
Start With Your Wall SizePlan Your Built-In Golf Room
Guides to help you choose the right enclosure, screen, and budget for your room.
Built-In vs Freestanding Enclosures
Which enclosure fits your room, budget, and how permanent you want the bay.
Golf Simulator Enclosure Buyer's Guide
Compare DIY, Pro, Curved, and built-in Carl's Place kits to match your room.
Impact Screen Materials
How to choose the right screen weave, color, and material for your room.
Golf Simulator Enclosure Cost
What an enclosure costs, from a screen-only build up to a commercial bay.
Your Purchase is in Good Hands
1-888-871-6110
Somewhere between measuring the wall and tensioning the screen, a question will come up. Real people who know this kit are a call away if you want a hand, from first measurement to install day.
Built-In Golf Room Kit Questions
A built-in golf simulator room mounts the impact screen directly to your wall instead of hanging it from a free-standing frame, so the screen becomes a permanent part of the room. The Carl's Place Built-In Golf Room Kit supplies a custom-sized screen and all the hardware to mount and tension it, and you finish the walls and ceiling for an integrated, studio look.
The kit includes a custom-sized impact screen with top masking, a pre-fed bottom cable, and a loose top cable, plus 2 cable locks with release pins, 4 corner cable anchors with 1/4 in lag screws, and 4 pulley wheels with safety wire lynch pins. It also comes with starter panels made entirely of loop fabric, 10 snaphooks, 10 zip ties for the corners, 50 hook-and-loop straps, 3 detached flaps, a fastener set, and detailed setup instructions. It installs with no pipe or frame, and you supply the wall and finishing materials.
Plan for a room at least about 14 feet wide with a ceiling of at least 9 feet, and stand at least 10 feet from the screen with roughly 7 feet of swing room around you. You also want at least 12 inches of buffer behind the screen and about 6 inches in front for the flaps and starter panels. Add about 36 inches of depth for each row of padded panels.
No. The built-in screen mounts straight to your wall with cables and anchors, so there is no pipe or frame. That is what keeps the floor open and gives the room its integrated, built-in look. If you would rather not mount to the wall, a free-standing Carl's Place kit stands on its own EMT frame instead.
The kit is designed for people comfortable with home-renovation and construction work. A proper install calls for using a laser level to align components, anchoring lag screws into the top and bottom plates of your walls, demoing any trim that interferes, and patiently tensioning the screen for a flat surface. If that kind of work is not a fit, a free-standing enclosure kit assembles without this level of construction.
The Built-In kit offers all four Carl's Place materials: Standard for budget builds, Preferred for a tighter weave and sharper image, Premium for the best image with reduced noise, and High-Contrast Gray for deeper contrast in rooms with ambient light. Gray needs a bright projector to drive it, 4,000 lumens or more, and a white screen is the better pick in a room you can darken. All four are built for full-impact play. Our impact screen materials guide breaks down the differences in detail.
Yes. Because the screen mounts to the wall and nothing stands on the floor, the room stays open. Finished with retractable curtains or panels that pull back, the same space can serve as a home theater, family room, or general entertaining area when you are not playing.
Each screen is sewn in Milton, Wisconsin and custom-made to your exact wall dimensions across 45 size combinations. Before your kit is produced, we confirm your exact screen size, masking, and panel layout with you, so the components fit your room the first time.
Yes. We offer Affirm financing at checkout, so you can split the cost of your built-in kit into monthly payments. Choose Affirm at checkout to see the terms you qualify for.
Carl's Place screens and enclosure materials are wearable goods, so they do not carry a warranty. Some marking and wear from the first sessions is normal, and how long a screen lasts depends on skill level, how often you play and how it is installed. If something looks unusual rather than like normal wear, send us photos and your order number and we will take it up with Carl's Place. All impact screen sales are final with no returns. Because fit and material choice matter, measure your space and pick your screen carefully before ordering, or call us at 1-888-871-6110 and we will help you choose.
See every enclosure option in the Carl's Place collection or the wider golf simulator enclosures collection, or call us at 1-888-871-6110.